
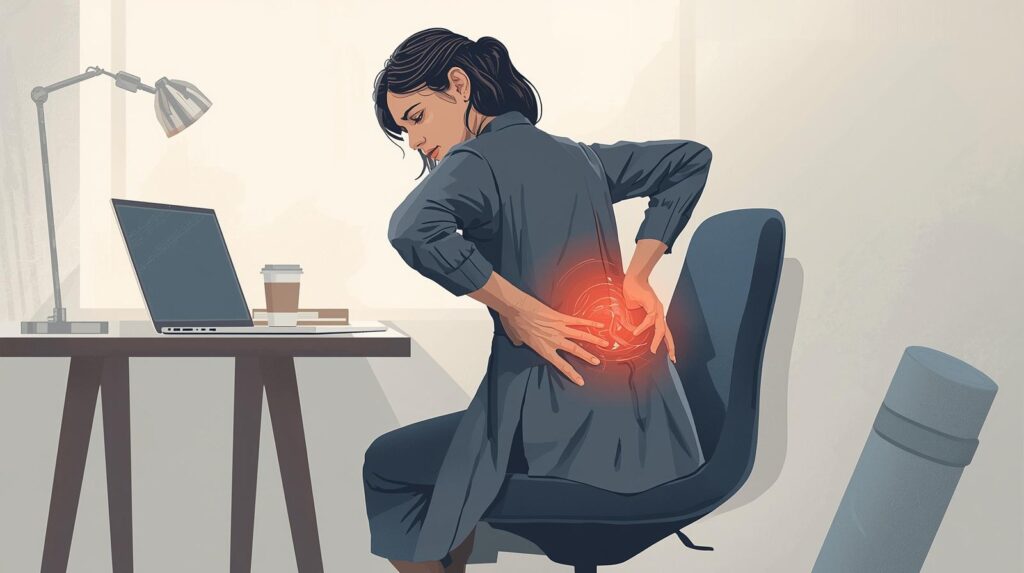
The psoas stretch is among the most effective methods for alleviating tight hips and naturally reducing lower back pain. The psoas muscle, commonly referred to as the hip flexor, links your lower spine to your legs. It is essential for maintaining posture, facilitating movement, and ensuring stability.
Nevertheless, contemporary lifestyles—particularly prolonged periods of sitting—can lead to tightness and weakness in this muscle. Consequently, numerous individuals suffer from stiffness, poor posture, and even chronic back pain. Additionally, stress and insufficient movement can exacerbate the issue.
This is where the psoas stretch proves beneficial. This straightforward yet impactful movement aids in releasing tension, enhancing flexibility, and promoting improved posture. Whether you are a novice or someone aiming to enhance mobility, incorporating this stretch into your routine can yield significant benefits.
In this guide, you will discover how to execute the psoas stretch, its advantages, and how to integrate it into your daily regimen for sustained relief.
Signs Your Psoas Muscle Is Tight
A tense psoas muscle can influence your whole body. Below are some typical indicators to be aware of:
- Persistent lower back pain
- Tightness in the hips or groin area
- Poor posture (leaning forward or slouching)
- Difficulty standing straight after sitting
- Pain when walking or climbing stairs
- Reduced flexibility in the hips
- Feeling stiff after long periods of sitting
If you observe these symptoms, incorporating a psoas stretch into your routine may assist in restoring balance and mobility.
Benefits of Psoas Stretch
The psoas stretch is an effective yet straightforward exercise that focuses on the hip flexors and aids in maintaining overall body alignment.
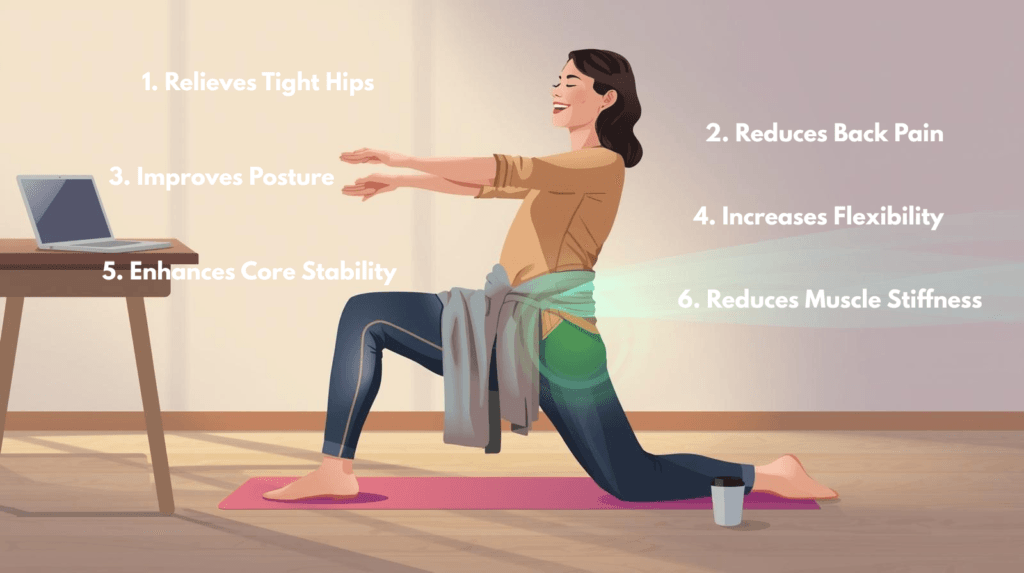
1. Relieves Tight Hips
The psoas muscle tends to tighten due to prolonged sitting or lack of activity. The psoas stretch gently opens the hip region, relieving accumulated tension and restoring natural movement.
2. Reduces Lower Back Pain
A tight psoas exerts pressure on the lower spine, potentially leading to discomfort. This stretch serves as a remedy for lower back pain, helping to alleviate pressure on the spine and reduce pain.
3. Improves Posture
Tight hip flexors can lead to a forward-leaning posture. By lengthening the psoas muscle, the psoas stretch assists in achieving a straighter stance and better alignment.
4. Increases Flexibility
Consistent stretching enhances your range of motion. The psoas stretch improves flexibility in the hips and thighs, facilitating movements such as walking, bending, and exercising.
5. Enhances Core Stability
The psoas muscle is intricately linked to your core. Stretching it enhances balance and stability, which contributes to improved overall body control.
6. Reduces Muscle Stiffness
Extended periods of sitting can lead to a stiff body. The psoas stretch aids in loosening tight muscles and enhances comfort throughout the day.
7. Supports Better Movement and Mobility
Flexible hip flexors enable smoother and more efficient movement. This is particularly beneficial for everyday activities such as climbing stairs, lifting, or exercising.
8. Prevents Injuries
Tight muscles are more susceptible to injury. By enhancing flexibility and balance, the psoas stretch diminishes the likelihood of strains and muscle injuries.
9. Promotes Relaxation and Reduces Stress
Stretching not only benefits the physical body but also soothes the mind. Engaging in deep breathing during the psoas stretch aids in releasing tension and fostering relaxation.
10. Improves Performance in Workouts
Regardless of whether you are walking, running, or engaging in strength training, having flexible hip flexors enhances your performance. Incorporating the psoas stretch into your daily stretching exercises routine equips your body for improved outcomes.
Integrating the psoas stretch into your regimen is an effective method to enhance flexibility, alleviate discomfort, and promote a healthier, more active way of life.
How to Do Psoas Stretch (Step-by-Step Guide)
🔹 Step 1: Get Into a Kneeling Position
Begin by positioning yourself on a soft surface, such as a yoga mat.
- Place your right foot forward
- Keep your left knee on the ground
- Your front knee should form a 90-degree angle
👉 Tip: Consider placing a cushion beneath your knee for added comfort.
🔹 Step 2: Align Your Body Properly
Maintaining good posture is essential for an effective psoas stretch.
- Keep your back straight
- Shoulders relaxed
- Core gently engaged
👉 Refrain from leaning forward or slumping.
🔹 Step 3: Gently Push Your Hips Forward
Gently shift your hips forward while ensuring your torso remains upright.
- You should feel a stretch in the front of your hip (hip flexor)
- Keep your movements slow and controlled
👉 This constitutes the primary aspect of the lower back pain relief stretch.
🔹 Step 4: Add Arm Raise (Optional for Deeper Stretch)
To enhance the psoas stretch, elevate the arm corresponding to your back leg.
- Lift your arm overhead
- Slightly reach upward (not backward)
👉 This action aids in intensifying the stretch across the hip and torso.
🔹 Step 5: Hold the Stretch and Breathe
Sustain the position for 20–30 seconds.
- Take slow, deep breaths
- Relax into the stretch without forcing it
👉 Proper breathing assists in alleviating tension and enhances the effectiveness of the stretch.
🔹 Step 6: Return to Start Position
Gently retract your hips and lower your arm.
- Return to the starting kneeling position
- Take a short break if needed
🔹 Step 7: Switch Sides
Execute the identical movements on the opposite side.
- Perform 2–3 rounds per side
⏱️ Recommended Routine
- Hold: 20–30 seconds
- Repetitions: 2–3 times per side
- Frequency: Daily or after long sitting periods
⚠️ Safety Tips for Beginners
To safely carry out the psoas stretch:
- Do not arch your lower back
- Avoid pushing too far into the stretch
- Keep your movements slow and controlled
- Stop if you feel sharp pain
- Maintain proper alignment at all times
💡 Pro Tip
For optimal outcomes, incorporate this stretch into your daily stretching regimen or a flexibility-focused routine. It is particularly effective following extended periods of sitting.
Common Mistakes to Avoid

To maximize the benefits of your psoas stretch, it is important to steer clear of these frequent errors:
- Arching your lower back too much
- Leaning forward instead of keeping your torso upright
- Holding your breath during the stretch
- Pushing too hard and overstretching
- Skipping warm-up before stretching
- Not maintaining proper alignment
Proper technique is crucial for an efficient stretching regimen aimed at enhancing flexibility.
When to Do Psoas Stretch

Timing your psoas stretch can enhance its effectiveness.
Morning
- Helps reduce stiffness after sleep
- Prepares your body for the day
- Works as an improve posture stretch
Evening
- Relieves tension from sitting all day
- Helps relax muscles before sleep
Before Workouts
- Warms up hip flexors
- Improves mobility
After Workouts
- Reduces muscle tightness
- Aids recovery
For optimal results, incorporate it into your daily stretching exercises routine.
How to Add Psoas Stretch to Your Routine
Consistency is crucial for achieving flexibility and alleviating pain. The psoas stretch is most effective when paired with other stretches.
👉 This stretch is most beneficial when integrated into a daily stretching routine for women that addresses the entire body.
👉 For comprehensive flexibility, pair this with a daily stretching regimen for women to enhance mobility and posture.
Begin with just a few minutes each day, then progressively extend your routine as your flexibility improves.
FAQs About Psoas Stretch
1. What is psoas stretch good for?
The psoas stretch helps relieve tight hips, improve posture, and reduce lower back pain.
2. How often should I do psoas stretch?
You can perform this stretch daily, especially if you sit for long hours.
3. Can psoas stretch reduce back pain?
Yes, it acts as an effective lower back pain relief stretch by reducing tension in the hip flexors.
4. Is it safe for beginners?
Yes, this is a beginner stretch routine that is safe when done with proper form.
5. How long should I hold the stretch?
Hold for 20–30 seconds per side, repeating 2–3 times.
Final Thoughts (Psoas Stretch)
The psoas stretch is one of the simplest yet most effective ways to relieve tight hips, improve posture, and reduce lower back pain. In today’s lifestyle—where long hours of sitting and poor posture are common—this stretch can make a real difference in how your body feels every day.
The key is consistency. Even a few minutes daily can help loosen tight muscles, improve flexibility, and support better movement. Start slowly, focus on proper form, and listen to your body as you progress.
For even better results, don’t rely on just one stretch. The psoas stretch works best when combined with a full-body approach. That’s why it’s a great idea to include it in a daily stretching routine for women, where you target all major muscle groups and build long-term flexibility.
By making stretching a daily habit, you not only reduce pain but also improve overall wellness, posture, and energy levels. Stay consistent, stay patient, and your body will thank you.
Authoritative References for Psoas Stretch

- NCBI (National Center for Biotechnology Information): According to research from the NCBI, the psoas muscle plays a key role in posture and movement. NCBI
- Scientific Reports (Nature Journal): Studies show that tight psoas muscles are often linked to prolonged sitting and lower back pain. Scientific Reports
- PubMed Research (Biomechanics & Spine Health): Research published on PubMed highlights the importance of the psoas in spinal stability. PubMed Research